Lightsaber Rotoscoping
In this procedure I will describe and outline how to take a digital picture of a person and add a special effect called Rotoscoping. It will enhance the light saber. Rotoscope is a term used to describe the editing of images. Usually the images are individual video frames.If it sounds a bit report-ish, that is because I wrote this for a tech writing class.
Rotoscoping can be thought of as “painting on movies”. I will describe the steps to do this using Adobe Photoshop 5.5 and Photoshop Elements.
STEP ONE
The first thing you need to do is to take a sutable picture. The picture should be of a person holding a toy lightsaber or a stick.
Once you have the image of the subject on the computer, load Adobe Photoshop and open your picture.

STEP TWO
The next step is to add a new layer on top of it. The image currently has only one layer, which is the background layer. On the menu click “Layer” > “New” > “Layer”. You should label this layer, but if you don’t the computer will assign it a default name. What we have just done is add a transparent sheet on top of the picture. This will allow us to draw on the image without changing the original picture. This is also where all our editing work will take place. The picture should look unchanged so far.


STEP THREE
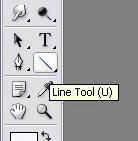
Using the “Line Tool” add a 15 pixel line over where the light saber.
If you are using Photoshop 5.5 the line must be white.
If you are using Photoshop Elements the line must be the color the light saber you desire.
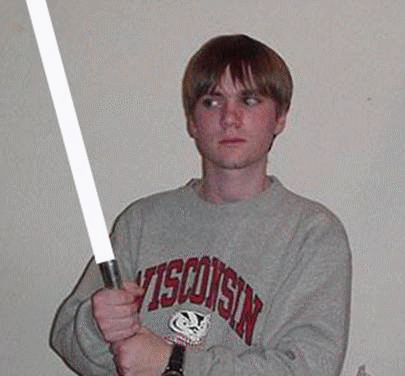
The image should now look like the photo below.

STEP FOUR
The next thing we need to do is to finish the tip of the blade. An example is shown in the black box below. When you look at the above image, you can see that the blade looks mostly fake or drawn in, but this will change. On the menu click “View” > “Zoom In”. Repeat this until you can see the individual pixels on the tip of the blade. Select a rounded brush and be sure it’s just wide enough to give the tip a rounded edge. You could also zoom down to the other end of the blade to do some touch up work there as well. Your tip should now look rounded like this. Return the zoom to normal.

STEP FIVE
The last step is the one that will make the bar line into a realistic looking light saber.
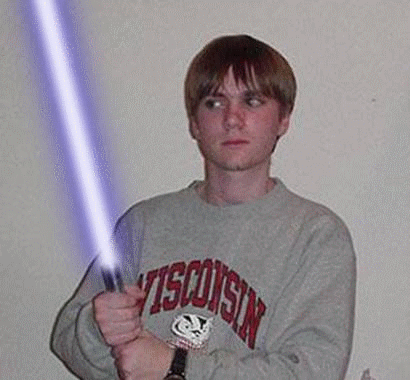
If you have Adobe Photoshop 5.5, on the menu click “Layer” > “Effects” > “Outer Glow”. A small dialog box will pop up titled “Glow Options”. Set the “Color” to a shade of blue (personal preference here), “Opacity” to 100%, “Blur” to roughly 20-25 pixels, and “Intensity” to about half (roughly 250 or so). The Blur and Intensity can be adjusted to your personal preference. You’ll be able to see the changes happening to the picture behind the dialog box. Basically just play with these settings until the blade looks the way you want it to. Click “OK” and you’re done! Your image should look a little something like it does below.
If you have Adobe Photoshop Elements, on the menu click “Filter” > “Blur” > “Gaussian Blur”. Drag the slider bar to blur the colored line. Your image will not look very good, yet. The blur should be approximately 5 to 25 pixels. These settings are not set in stone. Basically just play with it until the blade looks way you would like it to. Now you need to add another layer just as we did before. Draw another 15 pixel line in the same place as the first line on the new layer, but this time make the line white. Use the “Gaussian Blur” to blur the white line over the colored one. Your final product should look like it does below.

The enhanced image now looks like a real lighted light saber, like you’d see in the movies! As you can see, Rotoscoping is easy enough for even the most novice computer operator to create. Rotoscoped images are used throughout the movie industry, and in many other applications where images are enhanced.