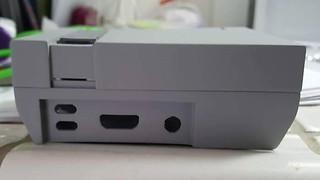
NESPi 3D Printing and Case Assembly Guide
On this page you will find:
- 3D File Downloads
- Printing Tips
- Case Assembly Guide
- Finishing and Sanding
- Painting

Case Parts and Links
Below are links to Mini NES Case designs on Thingiverse that are compatible with the Raspberry Pi. Mixing and matching parts from different designers is possible, see recommendations below. You will need a set of the following parts:
- Bottom Shell
- Top Shell
- Buttons
- Button Holder
- Lid
- Lid Trim
- Cartridge Tray
- Tray Crossbar
- Tray Peg
- Front Black Trim
- Back Black Trim
- Fan Mount
- LED Lens
- Several Cartridges

Raspberry Pi 2/3 Cases
- Mike G (DaftMike) - Mini NES Raspberry Pi Case
This is the original Mini NES case design. It will fit a Raspberry Pi 2/3 board and features a working Cartridge Slot Door and a Front USB Port. This is design is the basis for this project and contains all necessary parts. However, you may want to use one or more of the alternate parts below in combination with this. - Evan Wright (kiddingme) - Mini NES Bottom Shell for Different USB Port
Bottom Shell that better fits larger front USB ports. - Evan Wright (kiddingme) - Alternative Button Holder
Button Holder for these buttons that can be picked up at Frys electronics. - Aaron Groom (agr00m) - NESPi 8mm Button Holder
Button Holder with actual inside dimension of 8.7mm x 8.7mm. - Evan Wright (kiddingme) - Mini NES Slim Fan Duct
Fan Mount for a 30mm fan that can be purchased at Frys electronics. It is designed to put the fan up as high as possible leaving room for the Electronics Kit. - Fondero - Cart Lid Mini Nes Raspberry Pi Case
Lid and Lid Trim with reinforced hinge fittings. The original lid may break when being installed. - Evan Wright (kiddingme) - Mini NES Embedded NFC Tray
Cartridge Tray with a spot for the NFC reader. Allows more room for motion of the tray.

Case Accessories
- Mike G (DaftMike) - Mini NES Cartridge
This is the cartridge that will fit your Mini NES's Cartridge Slot. - Evan Wright (kiddingme) - Mini NES No Glue Cartridge
Cartridge assembly that does not require gluing and can be taken back apart easily. Cutout accepts round mifare tags. - Stefan Lindstr (stefanli) - Mini NES cartridge sleeve
Cartridge sleeve for the Mini NES Cartridges. Print at about 105% to ensure smooth fit. - Luke Hawker (hawker180) - Mini NES Cartridge holder for Raspberry Pi
Cartridge Holder for the Mini NES Cartridges. Holds 5 or 10 cartridges. - Random11 - Lan Cover for Mini Nes
Ethernet dust cover cover. - Daniel Foley (dfoles) - LAN Cover v2 for Mini NES
Better fitting ethernet dust cover.

Raspberry Pi Zero Cases
- Mike G (DaftMike) - Mini(er) NES Raspberry Pi ZERO Case
This case design is functional but incomplete. Build at your own risk.

Raspberry Pi 1 Cases
- Tou Xiong (touxiong) - Raspberry Pi B+ Mini Classic NES case with Power Jack
This case will fit a Raspberry Pi B+ board and features a Front USB Port, a panel mount 2.5mm x 5.5mm DC Power Jack, can fit both 7mm and 8mm buttons.
Please Note: The cartridge slot does NOT open. - Eladio Martinez (mafe72) - Raspberry Pi A/B Mini Classic NES case
This case will fit Raspberry Pi A/B boards and features a working Cartridge Slot Door, Front USB Port, a memory card slot, a micro usb breakout board, self-locking clip assembly, and a fan bracket.
Printing and Filament Colors
Now that you have all the files, it is time to warm up your 3D printer. The Mini NES Case Parts are a 4x4x2 inch objects. It is recommended to use a printer with at least a build area of 8x8 inches. If you are shopping for a printer, you can ask for advice on the Facebook Mini NES Builders Group.
Tip: If you do not own a 3D printer, you can outsource the print job to a local maker in your area using r/3Dprintmything.
Because of the size of the print PLA filament is recommended, but ABS can be used if you are experienced with the material.
The colors needed are Light Gray, Dark Gray, Black, and Transparent Red.
Black and Transparent Red are easy. Just buy that color from your favorite filament brand.
However, the shades of gray are bit more tricky if you do not plan to paint the finished print.
See below for some recommendations that have been reported to work well.
For specific printing instructions, DaftMike's Video Guide is your best resource.
Suitable Light Gray Filaments (Top Shell):
- MeltInk3d PLA Cool Gray
- SEGADEN PLA Grey
- ALGIX APLA Ingenious Gray
- ProSpec PLA Light Stone Gray
- FormFutura PLA Light Grey
Suitable Dark Gray Filaments (Bottom Shell):
Case Assembly
This guide is based on the work of DaftMike. You can see the video version of this guide here. The changes verses the video guide are that we use a paper clip for the lid hinge, and the front switch/button assembly and USB Extender assembly have been moved to be part of the Electronics Kit Assembly.
To assemble the Mini NES Case, you will need the following items.
- Cartridge Latch
- Bottom Shell
- Top Shell
- Buttons
- Button Holder
- Lid
- Lid Trim
- Cartridge Tray
- Tray Crossbar
- Tray Peg
- Front Black Trim
- Back Black Trim
- Fan Mount
- LED Lens
- Super Glue
- Paper Clip
- Aluminum Tape (optional)
- 25mm 5V Fan (optional)

Tip: If you have an old PC case in your junk pile, you may be able to salvage the case's front panel latch to use as the Cartridge Latch.
Breakoff the printing supports from the Top Shell.
- If you printed your shell with supports, now is the time to remove them.
- You will find that they snap off easily.
Install the lid trim pieces to the Top Shell.
- Place the lid trim into the cartridge slot as shown.
- Affix with super glue.
- This hides the rough edge from 3D printing.
Install the slot lid.
- To make the hinges, straighten the Paper Clip and snip into two short lengths approx 0.4 inch (10mm).
- Insert one of the hinges into the Top Shell.
- Insert the lid to fit into the hinge.
- Use a plyers to bend the hinge into a U shape. Bent on both sides,
- Once you get the lid movement to your liking, repeat for side two.
Tip: You can also shape the hinge into a L or I shape. Use super glue on one side to keep the hinge from falling out. ONLY ONE SIDE.
Install the Black Trim.
- Test fit the two Black Trim peices to the Top Shell, confirming which is the front and which is the back peice.
- Put super glue on the both the Top Shell and the two Black Trim peices.
- While pressing the parts together, reposition for the best fit.
Assemble and Install the Cartridge Tray
- Remove the supports around the hinge of the Cartridge Tray.
- Wrap a small length of Aluminum Tape around the Tray Crossbar (optional). This gives it the appearance of being made of metal.
- Use super glue to attach the Tray Crossbar to the Cartridge Tray.
- Insert the Tray Peg. Use plyers if needed to make fit.
Optional: Install the Fan.
- Use screws or super glue to attach the fan to the Fan Mount.
- Use glue to attach the Fan Assembly to the Top Shell as pictured.
Tip: If you intend to install the Electronics Kit, be sure that you are using the Slim Fan Duct and not the normal Fan Mount part.
Install the Cartridge Latch
- Your Cartridge Latch should look like the one in the picture.
- If your latch has arm flanges, cut them off.
- Push the Cartridge Latch into the Bottom Shell until it clicks into place.
Close the Top and Bottom Shells
- Line up the Top Shell and Bottom Shell.
- Starting with the back corner, press the shells together.
- The case will click together.
- Press all the corners until the shells locked together.
- Insert a Cartridge and test that the Cartridge Tray clicks up and down.
- To open the case back up, apply a bit of pressure and the shells will click back apart.
Case Finishing
After printing, many are pleased with the appearance of the print. However, you may not be satisfied with the striation lines or want to fill in / smooth minor defects in your print.
Acheiving the appearance that your Mini NES Case was "just pulled from a factory mold" with a smooth and clean finish is possible with a little elbow grease.
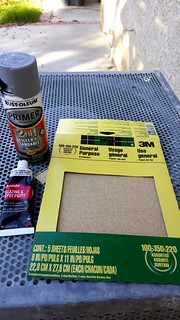
Supplies needed to smooth out your nes case:
- 100/150/220 Grit Sand Paper
- Rust-Oleum 2 In 1 Filler and Sandable Primer Spray, Gray
- Bondo Glazing and Spot Putty
The goal of finishing the case is to smooth out all the 3D printing lines and fill in any bumps and gaps.
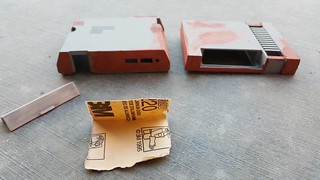
- Wash the case with dishsoap and Air dry for 24 hours. This is to remove oil and debris from the print.
- Spray the Mini NES Case with primer. Make sure that you have even coats. Optional: Spray the inside of the case too.
- Air dry for 24 hours.
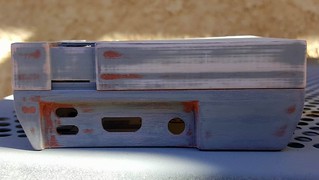
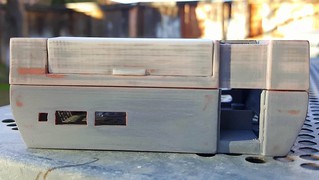
- Use 150 Grit Sand Paper to smooth out the print lines. Note: It is ok that this also sands away some of the primer. Goal is the primer to fill in the gaps of your print.
- Wash the case with water and Air dry for 24 hours.
- Use Bondo on all deep uneveness. (Let it dry and fill in the gaps. Bondo hardens quickly) I usually bondo and leave it alone.
- Using the 150 grit sandpaper, sand out the bondo. You'll know when to stop as soon as you're close enough to the case. (Like close shaving your beard).
- Wash the case with water and Air dry for 24 hours.
- Repeat steps above until satisfied with the finish. Switch to 220 Grit Sand Paper after the ridges are gone (possible by 3rd coat).
- Print lines may still be visible after sanding, but as long as the finish feels smooth give it one more coat of Primer to make sure. Then if you are happy with the outcome, you are ready to paint.
Tip: The number of coats varies (primer + bondo). Your case may only require 3 coats, others may need more than 10 coats.
Painting
After finishing your case (above), you will want to paint your case parts to acheive the correct look. The list below is from the Facebook Mini NES Builders Group with some recommendations of paints that are known to work well.
Light Gray Spray Paint (Top Shell):
- Krylon Fusion - 2439 Satin - Pewter Gray
- Krylon - Chalky Matte - Misty Gray
Dark Gray Spray Paint (Bottom Shell):
- Krylon ColorMaster - 53551 Gloss - Classic Gray
- Krylon - Chalky Matte - Slate
- Rustoleum - 249088 Flat - Gray Primer
Black Spray Paint (Trim):
- Krylon Fusion - Satin - Black
- Rust-Oleum Painter's Touch - Semi-Gloss - Black
Protective Clear Coat (optional):
- Krylon Fusion - 2444 Clear
- Rustoleum Painter's Touch - Gloss - Clear
Here are some basic steps for the final painting of your Mini NES Case. These steps are based on the Ultimate Guide to Finishing 3D Printed Parts.
Once again, standard spray painting principles apply:
- First make sure your surface is oil-free, dust-free and hole-free
- Shake your cans for at least two minutes prior to painting
- Ensure your cap is clean to prevent drips
- Be aware of how the paint is accumulating on the part and look for any pooling or dripping
- Paint in many light coats rather than fewer heavy coats; this is especially important for 3D printed parts with internal and obscured geometries
- Paint in controlled, well-ventilated and well-lit areas

Congrats! Did you enjoy this guide? Please consider donating by paypal to thatdecade@gmail.com.


